14 December 2011

Build a utility lap desk

Lap desks aren't just for laptops. Particularly for the DIY-inclined apartment dweller, having some modular workspace that fits behind a bookcase or under the bed comes in handy.

If you want a smaller one for your MacBook or, the way I use my store-bought unit most, as a bedside mousepad, they're cheap or you can make your own. When it comes project time, though, I'd rather not mar my lap desk, my desk-desk, or my kitchen table, and I can always use more surface area.

In the way that projects beget projects, resurfacing some thrift-store furniture with contact paper inspired me to put together this beauty:

Refined, I know. The main components were an old bulletin board and some black packing foam, joined with contact cement. The frame was already broken, but it happens to be useful having two sides open, and the piece from the bottom makes a passable straight-edge. Scraps of contact paper provide some smooth surface area while the cork remains mostly exposed for cutting, pinning, or anything messy. I keep an old gift card and some thumbtacks on mine, but you could attach any kind of hardware, including screwing on a zippered pouch, pencil case, or divided storage bin to keep small tools, pencils, or a razor knife handy.

Here's the underside:


The foam came with some computer equipment and works great, being just pliant enough to be comfortable in the lap while providing a stable foundation.

If you don't have these exact materials on hand, consider what you do have. To me, DIY is all about re-purposing and improvisation, not drawing up a blueprint and driving to Big Box Hardware or Ikea. This beast has come in handy for half a dozen projects, plus serving standard lap desk duty when its petite, prettier counterpart is in another room.

03 November 2011

Bicycle U-lock & Cable: Wrap & Stash

I use a Kryptonite U-lock and plastic-sheathed steel cable to lock my bike up in the city--you can almost always find someplace secure to lock up in any given half-block stretch. It took some trial and error, though, to figure out how to carry the thing. I could never get the frame mount that came with the thing to stay in place on the frame, and of course the first time it came loose, the sheet of rubber meant to protect the frame was in the wind.

I ended up using the cable itself to secure the lock to the frame, and here's how I do it:

First, bring the ends together, folding the cable in half, then pass the bend through the two loops.


Next, drop the straight end of the U-bar through the hoops, with both the single and the doubled cable-bends on the outside of the U.


Pass the doubled cable-bend over the angled end of the U-bar, and use the single cable-bend to pull it just snug, not too tight. You don't want too much slack in the remaining length of cable.


Now wrap the single cable-bend around the straight side of the U-bar, and pass its loop over the angled end, just as you did the doubled bend.


And you're done! Attach to your frame as pictured, and the cable will provide enough tension to hold the lock firmly in place.


Depending on how sensitive you are about the paint job on your frame, you may want to wrap a bit of inner tube around the top of the frame where the top of the lock will rest, securing it with some tape. I was a little concerned at first that this arrangement might be hard on my rear brake cable, but it hasn't been a problem.

22 October 2011

Cookies! Aztec Chocolate Sugar Cookies

I'm a chocolate addict--not the vaguely brownish milk/sugar (or more often in the US, corn) concoctions in the candy aisle, but real cacao. At sufficient concentrations, it's a little intoxicating.

Now, these aren't 50%+ cacao Dagoba or Green & Black chocolate bars, but they do deliver a surprising punch of real chocolate flavor. I started with this recipe and added a little spice, as well as adjusting the prep to save time and get a great texture/consistency. Just enough cayenne (or any chile) can really open up a rich flavor like cocoa, and gets balanced by the sweetness of the sugar, so that it doesn't add heat so much as it enhances the other flavors.

This was my first foray into baking, by the way, so it's quite an easy recipe. Yield is about two dozen cookies.

Materials

At least:
2 large bowls (wet + dry ingredients)
1 mixing implement (e.g. wooden spoon)
1 clean, flat surface
1 oven
1 baking sheet

Optional (preferred):
1 electric hand mixer (step 2, start step 3)
1 sifter or whisk
1 more baking sheet
1 sharp, non-serrated knife (e.g. French chef's knife)
OR
1 dough cutter/scraper

Ingredients

1 1/2 cups all-purpose flour
3/4 cup unsweetened cocoa powder
1 1/4 teaspoons baking powder
1/4 teaspoon cinnamon
1/8 teaspoon cayenne
1/8 teaspoon salt
3/4 cup butter, shortening or margarine*, softened
1 1/4 cups white sugar
1 egg

*I like to use 1/4 cup butter and 1/2 cup margarine. I'll pop them in the oven in a coffee mug while I'm gathering ingredients. The oven's always above room temp just from the pilot lights.

Directions
  1. Mix and/or sift* the flour, cocoa, baking powder, cinnamon, cayenne and salt. Set aside.
  2. In a separate, large bowl, mix butter and sugar until smooth. Beat in the egg.
  3. Gradually stir in the sifted ingredients to form a soft dough.
  4. Divide dough in half and, on powdered surface**, roll into approx. 1 1/4 inch diameter logs.
  5. Preheat the oven to 375 degrees F (190 degrees C). With a sharp knife or dough cutter, slice logs into 1/8 to 1/4 inch thick rounds. Toss each round in powder mixture and place on baking sheet, even spaced.
  6. Bake for 10 to 15 minutes in the preheated oven.
  7. Your call. I immediately use tongs to gently move the cookies from the baking sheet to a glass or ceramic surface, then let them cool for a good 45-90 minutes before loading my cookie jar (or sealed storage bag).
*As a novice baker, I don't have a sifter or even a strainer. I tried a colander, but that was slow, awkward and ineffective. The best method for me was my first improvisation: a quart bell jar, a butter knife, and a second, flat-bottom container. I put the ingredients in the jar (which also served as my dry measure for the cocoa and flour), stirred them together with the knife (not too vigorously), then used sweeping motions of the knife at the lip of the jar to sift the mixture into the second container. I played whack-a-mole with any visible clumps, and it all got a final sifting going into the dough. A whisk might be a better solution than even a sifter, and I'm not sure how a strainer would compare to my method--I suspect it would be as slow as a colander, almost as awkward, but much more effective.

**One would use flour for most recipes, but then you can get white splotches on your finished cookies and even blunt the flavor a little with that outer coating. I've found a 2/2/1 ratio of cocoa to flour to sugar works best to preserve the color and even give the flavor a little bump. I start with 1 Tablespoon each sugar and cocoa and 1/2 Tablespoon sugar, then replenish before I cut up the second log. I mix them right on the surface (I use a glass cutting board) with the dull top edge of the blade on the chef's knife I'll be using to slice the logs. You'll want your hands dusted with the mixture, too.

I could see adding maybe 1/2 teaspoon of vanilla in step 2, but haven't had it around while I've been making these. If you want to go double chocolate, 1/2 cup dark or semi-sweet chocolate chips are always an option, but this recipe really doesn't need them.

20 October 2011

Working with Bootable SD Cards

My experience with bootable SD media is specific to microSDHC cards in the Nook Color tablet/ereader, but the issues people encounter will probably apply to any device, particularly any Android device, that boots first from its SD reader. These issues are also largely Windows-specific, but some of the concepts apply more broadly.

The ability to boot first from external media makes modifying or repairing a device much simpler and more straightforward in a lot of ways, but it also introduces concepts and processes that may be as unfamiliar to veteran Android rooters and flashers as they are to total tech neophytes (aka n00bs).

Bootable Media

Anyone who has installed a computer operating system (OS) or run a Linux live disk is aware that nearly all full-fledged computers check to see if any of their optical drives (CD, DVD, Blu-Ray) and/or USB ports and/or flash card readers contain any bootable media before loading the OS on the primary system drive. Most programs run inside of an OS. For external media to be bootable, it must provide an alternate framework within which its program(s) can run: an OS of its own, however simplified in most cases. As long as all of the host device's hardware is intact, no matter how badly the native OS is screwed up or how tightly it's locked down, bootable external media can do things like reset factory defaults, run hardware diagnostics, in some cases extract, move, or erase data, or install a whole new OS.

No ADB? No Root? No Problem.

In terms of Android modding, particularly running custom ROMs (volunteer-built alternative OSes), bootable SDs allow us to skip some preliminaries like installing developer software packages and drivers on our PCs, rooting our device's stock firmware, and replacing stock recovery with custom utilities. It all but eliminates the risk of "bricking" (rendering the device permanently unable to boot), because again, no matter how badly you screw up the software, you can always plug in a bootable SD, wipe the system clean, and start over. Because you didn't overwrite the stock recovery, you may even have the option of triggering a built-in factory reset. Moreover, because SD cards are almost identical to an Android device's internal flash storage, complete custom ROMs can often be run stably from SD cards without altering the stock software at all.

Obstacles, Ordeals & Misunderstandings

While bootable SDs are often more direct, safer, and more flexible than other modding tools, they can also be less familiar and intuitive than some of the install-and-click root methods out there.

  • Software: You'll need a disk-imaging program like WinImage (shareware) or Win32DiskImager (free and open source). The latter is designed more with developers than average users in mind, and the installation process can be daunting. Both are intended more for backing up and managing images than writing a downloaded image to a new disk, so it's by no means obvious at first glance how to accomplish our task, though most modding guides give specific instructions. In WinImage, it's Disk | Restore Virtual Hard Disk Image on Physical Drive. Make sure you know your card's drive letter, then select file type All Files.
  • Hardware: Not all card readers that can read SD are reliable for writing images. Your laptop's all-in-one cardhole probably won't work. Even a regular-size SD slot and an adapter may not work. Some people (including me, making my first card) have success using a tablet, phone, or camera as their reader via USB, but if the connection is interrupted, the card may be rendered unreadable. Your best bet is a USB É¥SDHC reader, which are quite inexpensive. The other options are worth a try, but if the image isn't writing, the reader may be to blame.
  • Cards and Class: If you're only making the card to run a rooting utility or a custom recovery like ClockworkMod, any card will do. For running ROMs from SD, however, class 2, 4, and unclassed SanDisks seem to outperform most other cards. Card class measures only how fast a card can read and write large, sequential files, like high-megapixel digital photos; indeed, few devices other than a newer SLR camera will benefit in any way from a class 10 card. An OS relies more heavily upon small, random reads and writes, which are not measured by card class and often suffer in higher-class cards.
  • Partitions: Some bootable images, particularly a complete OS, will need to divide the card into multiple partitions (separate virtual disks on one physical disk) to function properly, but Windows Explorer only looks for the first partition. So, Windows may tell you your 8GB SD is now only 103MB: DON'T PANIC. It's perfectly normal. If you need to erase the card, use SD Formatter. If you still don't see the whole card, use EASEUS Partition Manager's slider interface to delete all but one partition and stretch that one to take up the remaining space on the card, then format again.
  • Downloads: they get corrupted sometimes. Check the md5 sum of your image files if available, or if an image doesn't write successfully, delete and re-download.

Updating a CM7 SD install for the Nook Color

With the recent release of a signed, stable version of CM7.1, many people are trying for the first time, in some cases after months, to update their SD installs. Now, there's more than one SD install out there. These instructions apply only to cards prepared using verygreen's SASD method. If you used another method, such as a size-specific SD image of CM7, or a pre-made Phiremod/Honeycomb dual boot card, consider this step zero: backup with Titanium Backup, wipe the card, and either make a SASD or consider other options.

To update a verygreen SASD running one of the CM7.0.x builds to CM7.1,

  1. Download the update for the installer/bootloader: http://crimea.edu/~green/nook/update-genimage-1.3.zip*
  2. Download the CM7.1 zip: http://download.cyanogenmod.com/get/update-cm-7.1.0-encore-signed.zip
  3. Download latest gapps (not required, but a good idea): http://cmw.22aaf3.com/gapps/gapps-gb-20110828-signed.zip*
  4. Remove the SD from your NC and plug it into your computer
  5. Move the first two files to the SD card (you will only see a 100MB-ish partition; that's where they go). If both won't fit, do the installer update first.
  6. Confirm that the files are still .zip format (some people accidentally unzip them due to their PC settings)
  7. Return the card to the NC and boot into the SD's alt partition (the installer): "hold nook N key and then press and hold power until the "Loading..." message appears and then disappears with screen going blank. Release power button, then press it again and hold for ~5 seconds, the bootloader "Loading..." message should be on the screen for three seconds or so before you release power button, keep holding N button until screen blanks again. If the screen went off while you were holding the power key, that means you were holding it for too long"
  8. The installer will automatically install the package(s).
  9. Repeat steps 4-7 for the remaining files.

*For most ROM udpates on a SASD, the installer update and gapps package would not be necessary. If you're already running a CM7 nightly more recent than #86, the installer update won't be necessary. They're only needed if you're moving from a CM7.0.x stable release to CM7.1. It is a good idea to update gapps if there's a more recent package at the bottom of this page.

As of now, there is no user-friendly update path from 7.0.x to 7.1 for any SD install other than verygreen's SASD, AFAIK. In the months that CM7.1 has been under development, the SASD has become very much the standard method for running CM7 from SD on the NC. If you purchased a pre-made CM7 card, check the vendor's website for update information.

04 October 2011

Your Nook Color Options: Root & ROMs

The Nook Color has seen a lot of modding, hacking and customization, due to its low cost, under-utilized hardware, and highly flexible, nigh-unbrickable configuration. After nearly a year of both regular firmware updates from B&N and furious volunteer development, the array of hacks, mods, custom ROMs and utilities for this device can appear sprawling.

What it comes down to, however, are three main options. All of them take advantage of the configuration that makes the NC so flexible in the first place; unlike most Android devices, the NC boots first from the ɥSD slot, in the same way a PC looks first for a bootable disk before loading the OS on the primary hard drive. As with a PC, this configuration makes it very easy to run a utility, install an OS, or even run an OS completely from bootable* ɥSD.

Rooting

When used as a verb, rooting means altering your current stock firmware to enable root, or superuser, access. Like having the Administrator account on a Windows PC, root allows you to change high-level settings such as those preventing you from installing unapproved apps, and accessing unapproved app markets. Rooting the NC maintains the stock interface, the stock reading app, and device-specific perks like in-store reading, but lets you install the Google and/or Amazon app markets, which have many more apps than the B&N market, often at lower prices. Apps purchased on those markets can also be installed on other Android devices.

If you basically like the NC's interface but would like a couple more apps, rooting may be your best option. The most common way to root the NC is ManualNooter. If rooting stock firmware 1.4.x, follow the linked instructions but use ManualNooter 5.12.20.

Custom ROMs (OS replacement)

Custom ROMs are volunteer-built operating systems that completely replace stock firmware when installed on a device. Virtually all custom ROMs have root access by default, and do not need to be rooted. Because we can boot from ɥSD, it's also not necessary for us to root before installing a custom ROM, as is necessary on many other Android devices. For the NC, there are three ROMs worth considering, and one to rule out.

  • CyanogenMod7: The CyanogenMod project is a robust team of developers releasing nightly improvement of their ROMs for a variety of Android devices. CM7, a version of Android 2.3 Gingerbread, is by far the the most feature-rich and flexible ROM for the NC, with the most community support. CM developers have added features like bluetooth, Tablet Tweaks, audio improvements, USB host, and more to the NC. Replacing B&N stock with CM7.
  • MiRaGe CM7.2 KANGs: With the CM7 team no longer providing quasi-nightly test builds, this ROM is the simplest way to keep up on the latest changes until there's a new stable CM7 build.
  • MIUI: a popular makeover of Gingerbread's UI, brought to the NC using CM7 codebase.
  • Honeycomb: the only versions of Honeycomb available for the NC are basically demos and are not being updated. Honeycomb is the only Android version for which Google has not released source code, so there is very little for devs to work with.

Custom ROMs (É¥SD install)

The NC's fairly unique configuration opens up a third option that leaves the stock firmware untouched and arguably preserves your warranty (though I still wouldn't mention it to customer service). Because it boots first from a ɥSD card, and that card is virtually identical to the internal flash storage (eMMC), it's possible to run a custom ROM entirely from ɥSD. This option is probably the best place for most people to start, even if you think you'll eventually be replacing the stock firmware. It's a fairly simple procedure that leaves you in a good position to make future changes if you decide they're necessary. With the right card (see instructions), many people find ɥSD installs to perform just as well as an OS housed on eMMC.


Beyond

For the more adventurous or more particular, you'll find a variety of projects on the xda-developers NC forums, such as moving your stock firmware to ɥSD. I've also assembled a guide for dual booting two OSes from eMMC.
____________________________________________________

*Perhaps the least familiar aspect of all these methods, where a lot of people run into trouble, is writing a bootable image to ɥSD. A couple of things to keep in mind:
  • Your laptop's all-in-one cardhole probably won't work. Even a regular-size SD slot and an adapter may not work. Some people (including me, making my first card) have success using the NC, a phone, or a camera as their reader via USB, but if the connection is interrupted, the card may be rendered unreadable. Your best bet is a USB É¥SDHC reader, which are quite inexpensive.
  • Downloads get corrupted. Check the md5 sum of your image files if available, or if an image doesn't write successfully, delete and re-download.

03 October 2011

Nook Color Dual Boot Guide


MAJOR UPDATE 2/22/12: While the process hasn't changed too much, the key files have all been replaced for greater flexibility, and they are NOT compatible with the old method using rookie1's prep-dualboot zip. For an update path from earlier versions of this guide or resources related to the earlier version, see the XDA thread.


This guide details how to repartition your internal storage and install two operating systems, or ROMs, side by side. If you want CM7/9 on SD without changing your stock install, you're in the wrong place: CM7 SD Install Guide. Previous versions of this guide only worked with CM7/9 on the primary partition set and stock on the alternate partition set, and there was no way to backup or easily update the alternate install. Now, you can have either system on either partition, or have CM7 on one partition and CM9 on the other, or two side-by-side stock installs. You can also move the alternate system back to primary to back up or update. I would call this process an intermediate or advanced mod, and would not recommend trying to follow these steps if you don't understand what you're doing.

This guide takes advantage of the multiboot functionality built-in to CM7.1 nightlies since about #140. As such, it is not compatible with CM7.0.x builds or with earlier boot menus.

What you'll get: Whatever two ROMs you install, each will have a 2GB /data partition for apps and they will share a 2GB /media partition for storage, and both will have access to the SD card for more storage. At startup you will see a small green bar labeled "CyanogenMod." You have a few options when this bar appears:
  • Do nothing, and your primary system will boot
  • Hold down both volume buttons, and your alternate system will boot
  • Hold down 'n' for a more detailed boot menu
  • Hold 'n'+power and recovery will boot (if you installed CWM internally)
All of these actions must be taken in the first few seconds, before any message appears below the green bar. Once you see a confirmation message, you can release all buttons.


DISCLAIMER: As usual, YOU are responsible for changes YOU make to YOUR device. If you're uncomfortable using ClockworkMod Recovery, turn back now. If you're not sure how your NC is currently partitioned, turn back now. If you want to preserve your warranty, turn back now. Here be serpents; be so warned.

Following the guide as-is with all default options gets you a stock 1.4.1 install on secondary and a CM7 install on primary. I hope you can figure out what to substitute where for different results.

Questions or difficulties should be directed to the thread on xda-developers.com.


Prerequisites:
  • CWM on either SD or internal recovery
  • Wi-Fi access


Materials:


Steps:

  1. Put all materials in your SD card's root directory.
  2. Boot into CWM.
  3. From CWM main menu, "backup and restore" and "backup."
  4. From CWM main menu, "install zip from sdcard," and "choose zip from sdcard."
  5. Choose the repartitionDual2GB file.
  6. Reboot recovery. If you have internal CWM and no boot menu, you may need to use the rhythm method:
    hold nook N key and then press and hold power until the {first} message appears and then disappears with screen going blank. Release power button, then press it again and hold for ~5 seconds, the {first} message should be on the screen for three seconds or so before you release power button, keep holding N button until screen blanks again. If the screen went off while you were holding the power key, that means you were holding it for too long
  7. Repeat step 4 and choose reformatData.
  8. If your backup in step 3 was stock, you can "backup and restore" then "restore" and skip to step 13.
  9. Otherwise, repeat step 4 and choose 1.4.1-keep-CWM.
  10. When it finishes, hold the power button to shut down, remove your CWM card (if applicable), and power back on.
  11. Complete B&N registration process¹
  12. Power off and boot back into CWM (may require rhythm method above).
  13. Repeat step 4 and choose BNpri2alt.
  14. From CWM main menu, in "mounts and storage," format system, data and cache.
  15. From CWM main menu, choose "Advanced" and "Wipe dalvik cache."
  16. Repeat step 4 and choose CM7/9 update zip.²
  17. Reboot into main partition and set up Wi-Fi.
  18. Reboot into alt partition (hit both volume buttons at once on "CyanogenMod" loading screen) to make sure it's working.
  19. optional: install gapps, keysmod, etc from CWM.

¹Any mods you want to make to stock, do it now: update to a newer version, root with Manual Nooter (if rooting 1.4.1, follow the linked instructions but use MN 5.12.20), flash keysmod, overclock kernels, or any other CWM-flashable mods.

²If you backed up an existing CM7/9 install in step 3, then after step 16 just install gapps, install keysmod if you want it, then from CWM's main menu, Backup & restore > Advanced Restore, and restore data only from your most recent backup. When you boot into CM7 (not tested with Phiremod), it will be just like you left it.³

³Steps 17 and 18 may look unnecessary, but several users experienced force closes in their CM7 installs when they didn't take these steps.


Other Resources:

  • CMpri2alt: Moves a CyanogenMod install from the primary partition set to the alternate partition set
  • BNalt2pri: Moves a stock install from the alternate partition set to the primary partition set
  • CMalt2pri: Moves a CyanogenMod install from the alternate partition set to the primary partition set
  • Revert dual boot: deletes the alternate partition set and alternate boot files. Does not restore stock partition sizes, but must be run prior to partitioning back to stock
  • 1.4.1 full restore: removes CWM from internal recovery, does not affect partitioning
  • 1.4.1-to-alt-partition: updates any existing stock install on the dual boot partition (removes root, does not remove installed apps)
  • Steps to back up and/or update both partitions
  • Instructions to rename boot files created with j4mm3r's multiboot
  • Possible fix for boot-loop at 'n' screen on stock partition (largely untested: don't use it unless you have this problem)


Credits:
  • repartitionDual2GB and reformatData provided by DeanGibson
  • 1.4.1 zips provided by rajendra82
  • BNpri2alt, BNalt2pri, CMpri2alt and CMalt2pri are minor alterations of DeanGibson's files linked above
  • revert-dualboot is a minor alteration of rookie1's remove-dualboot
  • Racks11479 provided key info for the above alterations

Originally posted on xda-developers.com

13 September 2011

Running CyanogenMod 10 from SD (Nook Color): Simplified Instructions

This guide is just a step-by-step re-write of verygreen's Size-Agnostic SD method. For help or more information, see the original thread.

The resulting CM10 install will run entirely from the SD slot, without altering the contents of the Nook Color itself. The NC will always try to boot first from the SD slot. To load the stock, on-board operating system, hold n/home right after powering on and choose "emmc" and "normal" from the boot menu. For all intents and purposes, this arrangement preserves your warranty, because when the card is removed there is no indication that the NC was ever anything but 100% stock.*

I make no guarantees, however, regarding how this process will impact your warranty or your device. YOU are responsible for changes you make to YOUR device. /disclaimer

Some people refer to this arrangement as dual booting, though more advanced users can also install and dual boot both OSes directly from the NC.


Materials
  • You will need a Micro SD card 1GB or larger. Class 4 Sandisk cards 8GB and larger have provided the most consistently stable installs. Class 2 and unclassed Sandisks have also performed well, but most other cards, while allowing you to install CM7, will have performance issues. More information.
  • You may need a USB Micro SDHC card reader. All-in-one readers found on laptops and some PCs are often unreliable for writing a disk image. Some people have success using the NC, a phone, or a camera as a reader, but it's not recommended, and may render the card unreadable if the process is interrupted. More information.
  • In Windows, you will need a utility such as WinImage or Win32DiskImager to write this image to your SD card. In Linux or Mac OSX use the dd command, being sure to write to the entire device and not a numbered partition. More detailed Mac instructions (thanks to justChris).
  • Download the disk image (thanks to leapinlar for the CM9/10-compatible revision) in compressed .zip format. It's an approximately 8MB file which you will extract into an approximately 200MB disk image. More info on CM9/10 compatibility.
  • You will also need a CyanogenMod 10 ROM from this list. This installer is made to work with CM 7.1 and up, not the older 7.0.x releases.
  • Finally, if you wish to activate a Google account for the Android Market, GMail and etc., you will need the CM10.0 Google Apps package from this page.

Steps
  1. Write the extracted image file to the SD card. In WinImage, the command is Restore Virtual Hard Disk Image on Physical Drive under the Disk menu. Be sure to choose the file type All Files so you can see generic-sdcard.img. It may take a few minutes.
  2. Copy the CM10 update file (as is: do not unzip) to card.
  3. Safely remove/eject the card from your computer, place it in your powered-off Nook Color, and power-on. The NC will unpack the CM7 ROM to the SD card, informing you of its progress, and power off when it is done. CM7 is now installed.
  4. If you wish to install Google Apps remove the SD card and return it to your PC.
  5. On your PC, copy gapps-*-signed.zip file (as is:do not unzip!) to the card's boot partition (the only partition Windows can now access).
  6. Safely remove/eject the card, return it to the NC, and boot into CM7.
  7. Set up a Wi-Fi network (important!), then hold and release the power button to bring up the power menu.
  8. Choose Reboot > Recovery. The NC will now reboot and install Google Apps, which can happen very quickly! You should be prompted to set up a Google account when you boot back into CM7, but if not, check Settings > Accounts & Sync before assuming the package did not install.


To add books or other media to the card's storage partition, you must boot into CM7 and connect to your PC via USB, and turn on USB storage by tapping through the "USB Connected" notification on the NC. If you connect the card to Windows with a card reader after writing the image in this guide, Windows will tell you there is only 200ish MB free on the card. More info on working with bootable SDs.
__________________________________________________________

*The one way you could inadvertently install something on the NC itself is to open ROM Manager and "Flash ClockworkMod Recovery," which would install CWM on the NC's recovery partition. Neither ROM Manager nor CWM are necessary or useful to maintain a CM10 SD install; leave ROM Manager alone or uninstall it until and unless you are ready to replace the stock OS with CM10 on eMMC (embedded Multi Media Card, shorthand for the NC's internal flash storage).

06 June 2011

My Nook Color F!AQ

This is not a general or comprehensive FAQ so much as my personal idiosyncratic list of things that made me go "F!" while working with the NC and CyanogenMod 7, and how I got past them. Items are listed in roughly the order they were encountered.

F! Rooting, ROMs, 1.2, 2.2, 2.3.4, 3.1, GingerFroCoSammich: WTF?!?

Don't take every recommendation as gospel, but this guide is a great starting point to wrap your head around all the options: http://quinxy.com/guides/how-to-pick-your-nook-color-operating-system-and-install-options/

F! Win32DiskImager requires half a dozen development environments and still doesn't work!

Okay, it's shareware not freeware, so you may still need Win32DiskImager down the road, but WinImage is a simpler, standalone utility and it's free for 30 days--and get this, not 30 consecutive days, but 30 days on which you actually open the program. For instance, I installed about a month ago, and am currently on evaluation day four. You will probably get sick of messing with this stuff long before you run out of eval days.

F! I can't find and/or write the disk image in WinImage!

The command to write the image is Disk>Restore Virtual Hard Disk Image on Physical Drive. You will have to show file type All Files every time in order to find the .img file.

F! I don't have a card reader, and need access to the boot partition of my bootable uSD card.

The simple, smart solution to this problem is STFU and get a card reader. However, you can access the uSD card's boot partition from the NC's stock OS. Power off the NC, make sure the card is ejected, and power back on. Before the OS has fully loaded, for instance on one of the splash screens, re-insert the card. Once the stock OS has loaded, it will now recognize the boot partition as storage. Inserting the uSD after the OS has loaded only gets me a "SD is ready to remove" message.

F! Why isn't my NC showing up in Windows when I plug in USB?

CyanogenMod does not automatically mount storage when you plug in USB. Open your notifications, tap the USB notification, and it will take you to the USB screen where there is a big "Turn on USB storage" button. Push it.

F! Chunks are falling off of my USB cable!

Maybe it affects some cables more than others, but the plastic around the light-up "n" on the USB cable is very brittle. B&N is aware, and will not give you a hard time about replacing the cable at no cost if you just call up customer service.

F! Where is the serial number on this thing?

The SN is under the movable flap that conceals the uSD slot.

F! I want to revert this bootable uSD to simple storage, but it won't format!

Some people have reported success just formatting the card, but it was no good for me. The simplest solution for me after trial and error was to use the graphical 'slider' interface in EASEUS Partition Master (free) to delete all partitions except the storage partition and then drag the ends of that partition to take up the unallocated space.

F! The sound is terrible. Like, terrible terrible.

It kind of just is :( Maybe some NCs are worse than others, but tons of people report ridiculously low volume through both the speaker and the headphone jack, as well as some cases of hissing or other artifacts over headphones, particularly high-end audiophile headsets. The situation can be aided considerably on CM7 by installing the Nook Tweaks app from the marketplace and adjusting speaker and headphone gain there.

25 March 2011

Shyamalan

Pretty much the only film of his I'll give credit as a finished work that accomplished what it promised/intended is The Sixth Sense. Unbreakable minus the last five minutes could have been pretty good, but it was the beginning of a long series of let-downs. His other films are a mish-mash of disparate memes that never get properly tied together and none of which are fully realized, with increasingly lackluster twists and, it would seem, deliberately stilted acting.

As a disclaimer, I haven't seen anything since The Village, but from all I've heard it's been downhill from there.

31 January 2011

How I hardwired my iPod dock

My first vaguely servicey blog post! Note that it's titled "How I hardwired my iPod dock," not "How to..." I'm not liable for injury or property damage, don't try this at home, and be careful with electricity; it's like super-fire. Consider yourselves disclaimed.

The item in question is an obsolete, el cheapo Memorex iTrek, of which the manufacturer disavows all knowledge and no schematics are to be found. It operated one (1) time on battery power, after which the wall plug was the only option. Eventually, through a combination of flimsiness and careless treatment, the prong that jacks the power cord into the unit snapped off inside the device. I've never seen a jack-prong quite like this one: about 2mm diameter, mostly hollow, and about as sturdy as aluminum foil. The iTrek got shoved in its case and stuffed in the closet for a year and a half.

Last week, I was in project mode and dug it out. Step one, I stared at the thing until I found screw holes, and unscrewed until I was 78% sure I had them all. I then took my largest flathead screwdriver and started prying the two halves of the plastic casing apart, all the way around the edges. When prying open small electronics for which you have no guide or schematics, it's best to assume you will break it at this step. Miraculously, I did not (well, not badly).

Don't mind the arrows and squiggly lines for now, but laid open, it looked something like this:
electronicsSorry for the crappy phone pics.

The circuit board with the power jack stands upright toward the left, with the jack itself between the white line's positive end and the red arrow's negative. I removed the board's securing screw and unseated it (without breaking any wire connections) to get a better look. The best solution for most devices, even laptops, is to find the jack's solder marks on the bottom of the circuit board, figure out which is negative and which positive, and solder the respective wire ends from your power cord directly on top. I don't have a solder gun, nor a budget for power tools, presently, so I needed another option.

I got a half-assed idea about using the contacts on the doors to the battery compartment, which led me to what I should have done first: mapping the power circuit. The white line in the above photo is traced over the black wire which connects the right-hand battery compartment to the positive end of the power jack. What you can't really see, jutting off the other side, is a trapezoid of thin, bent metal, split into two tines at the end: the contact where power feeds from the left-hand battery compartment to the negative end of the DC jack.

Armed with this information, the solution became obvious:
electronics

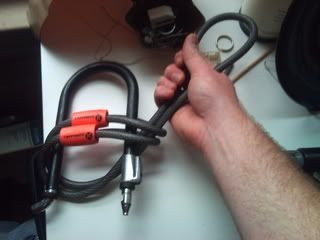
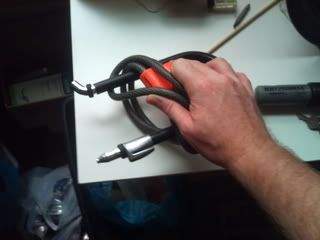
Now, this is a power cord; it's going to get tugged on at some point, and a solderless splice would pull apart pretty quickly under pressure. Fortunately, my eighth grade shop teacher bestowed upon me knowledge of the underwriter's knot, which acts as a shock-absorber to prevent power cords pulling loose from their contacts.
electronics
credit unavailable, c/o Google images

So, once I had a gameplan, my steps were:

1. drill a new hole for the cord in back casing
2. with a utility knife, cut the remains of the jack-in off the cord
3. split apart the cord for a length of 3" to 5" and strip the insulation from the last 1"
4. thread the cord through the new hole in the back casing
5. tie the underwriter's knot inside the casing
6. cut the wire I traced in white, strip the end, and splice with the negative power wire*
7. with needle-nose pliers, straighten out the metal contact and pull apart the tines, careful not to pull it off the circuit board
8. coil the positive wire around one tine, then cross the two tines over each other and twist them together**
9. insulate both splices with decent electrical tape or heat-shrink tubing
10. reseat the circuit board, repositioning wires as needed, and so:

electronics

*I used a Western Union Splice:
electronics
credit unavailable, c/o Google images

**I held the end near the circuit board steady with my needle-nose and twisted with regular pliers

So that was my extremely half-assed methodology. Maybe it will be of some use planning your own half-assery, though I wouldn't recommend it.
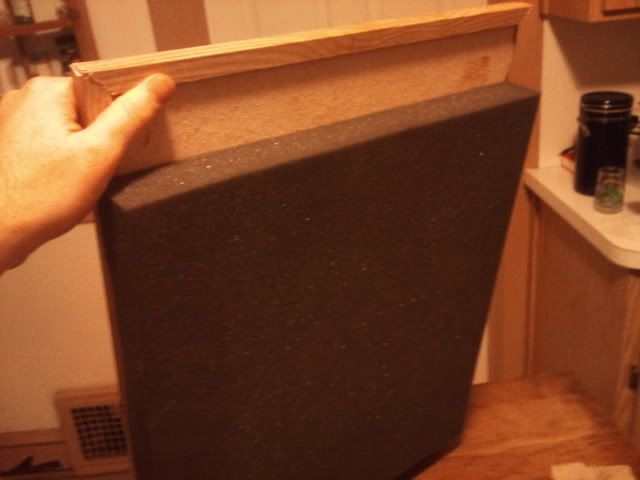
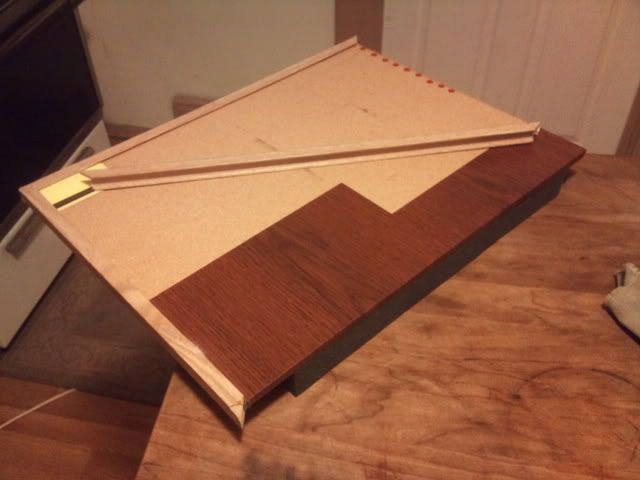
electronics